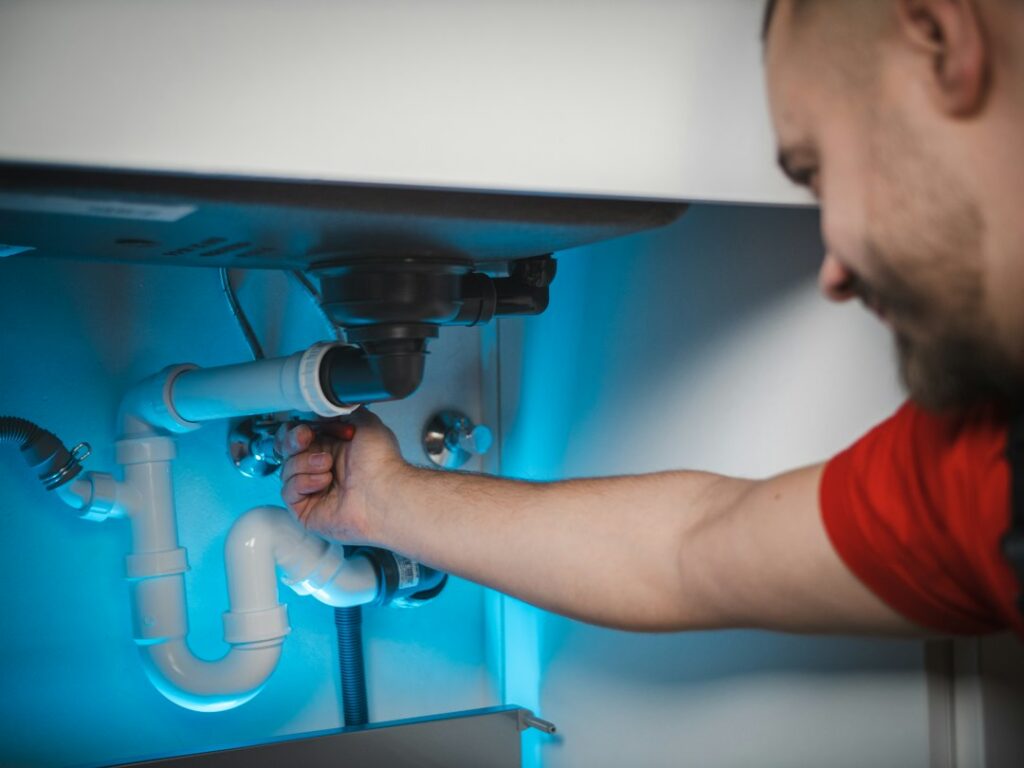
A damp cabinet under the kitchen or bathroom sink can be worrying, but the source is often a drain connection that has loosened or a worn washer. The curved pipe beneath the sink is the P-trap. It holds a small amount of water to help block sewer gases from entering the room. A leak at the trap should be found and corrected before moisture damages the cabinet or flooring.
Photo by Josh Lemmon on Unsplash.
What a P-trap does—and where it can leak
A P-trap is the curved section of drain pipe between the sink’s vertical tailpiece and the drain pipe leading into the wall. Its water seal helps keep sewer gas out. Common leak points include the slip-joint nuts at either end, the washers inside those joints, and cracks or corrosion in the trap itself.
Water can travel along a pipe before dripping, so do not assume the lowest wet spot is the source. Dry the whole assembly and watch where moisture first appears.
Photo by Yimeng Zhao on Unsplash.
First, confirm that the P-trap is the problem
- Remove stored items from the cabinet and dry the pipes, fittings, and cabinet floor with a towel.
- Place a shallow pan or bucket beneath the P-trap and keep a flashlight handy.
- Run the faucet briefly while watching the trap connections. Stop the water as soon as you identify the first place that becomes wet.
- Check whether the leak appears only while water drains. If water drips even when the faucet is off, inspect the faucet supply hoses and shutoff valves too; that may be a pressurized supply leak rather than a drain leak.
If a supply hose or valve is leaking, close the appropriate under-sink shutoff valve if it operates normally. If you cannot stop the leak, use your home’s main shutoff and follow this guide to finding the main water shut-off valve.
How to fix a leaking P-trap
1. Try a gentle adjustment first
For a plastic or tubular trap with slip-joint connections, check whether the nut at the wet joint is loose. Hand-tighten it until snug. If it still needs a little adjustment, use slip-joint pliers for a small additional turn. Do not force it: overtightening can crack plastic fittings, damage threads, or distort a washer.
2. Replace a worn or misplaced washer
If the joint continues to drip, its slip-joint washer may be flattened, damaged, missing, or incorrectly seated. Stop using the sink while the trap is apart.
- Position a bucket directly under the curved section. The trap holds water, so some will spill when it is opened.
- Loosen the slip nuts and carefully lower the trap bend. Empty the remaining water into the bucket.
- Remove the washer at the leaking joint. Check it for cracks, hardening, flattening, or a poor fit. Take it with you when matching a replacement so the size and style are correct.
- Clean the pipe ends and fitting surfaces with a cloth. Do not scrape or damage the sealing surfaces.
- Reassemble the joint using the replacement washer. Follow the washer manufacturer’s orientation instructions; on common tapered slip-joint washers, the tapered side faces the fitting.
- Make sure the pipes line up naturally before tightening. Hand-tighten the nut, then use only a small additional turn with pliers if needed.
Slip-joint connections normally seal with their washers, not with thread-sealing tape. For diagrams and product-specific installation guidance, see Oatey’s P-trap installation guide.
3. Replace a cracked or badly corroded trap
A nut adjustment or new washer will not repair a cracked plastic bend, a pinhole, or badly corroded metal. A replacement trap must match the existing drain size and configuration. Do not pull or twist the pipe entering the wall to make a new assembly fit; that can damage a concealed connection. If the wall fitting is loose, corroded, or difficult to match, have a plumber assess it.
Test the repair before putting everything back
- Wipe the trap and every connection completely dry.
- Run water for 30–60 seconds while watching the joints.
- Turn the faucet off, dry the fittings again, and check for slow seepage.
- If the joints remain dry, check the cabinet floor and nearby surfaces once more before returning stored items.
If a connection still leaks, stop tightening harder. Recheck the washer size, orientation, and pipe alignment. A damaged nut, distorted pipe end, or defective trap may need replacement.
When to call a plumber
- The pipe entering the wall moves, is cracked, or shows corrosion.
- The trap is metal and badly rusted, seized, or has a pinhole.
- A joint continues leaking after the washer and alignment have been checked.
- You notice persistent sewer odor, repeated drainage problems, or signs of water damage inside the cabinet or wall.
- You are unsure whether the water is coming from the drain, faucet supply, dishwasher connection, or another fitting.
How to help prevent another leak
Occasionally look inside the cabinet for dampness, mineral marks, loose items pressing against the pipes, or signs of corrosion. Avoid storing heavy objects where they can knock the trap out of alignment. If you notice a new drip, investigate early rather than waiting for the cabinet floor to become soaked.
Frequently asked questions
Do I need to turn off the water to repair a P-trap?
The P-trap is part of the drain, so shutting off the faucet supply is not normally required for a drain-only repair. Do not run the faucet while the trap is disconnected. If the leak is actually from a pressurized supply hose or valve, shut off that supply before investigating.
Should I use plumber’s tape on a leaking P-trap nut?
Usually not. Standard slip-joint connections seal with a washer compressed by the nut. Tape does not correct a damaged, missing, or misaligned washer.
Why does the cabinet still smell after I fix the leak?
The P-trap must retain its water seal to block sewer gases. Confirm that the trap is correctly assembled and holds water. If the odor persists, or you suspect a damaged trap or venting problem, ask a plumber to inspect the drain system.
Final thoughts
A leaking P-trap is often traced to a loose slip-joint nut or a worn washer, but accurate diagnosis matters. Dry the assembly, identify the first wet point, make only gentle adjustments, and test the repair carefully. Replace damaged parts rather than forcing them, and call a plumber when the wall connection, corrosion, or source of the leak is uncertain.