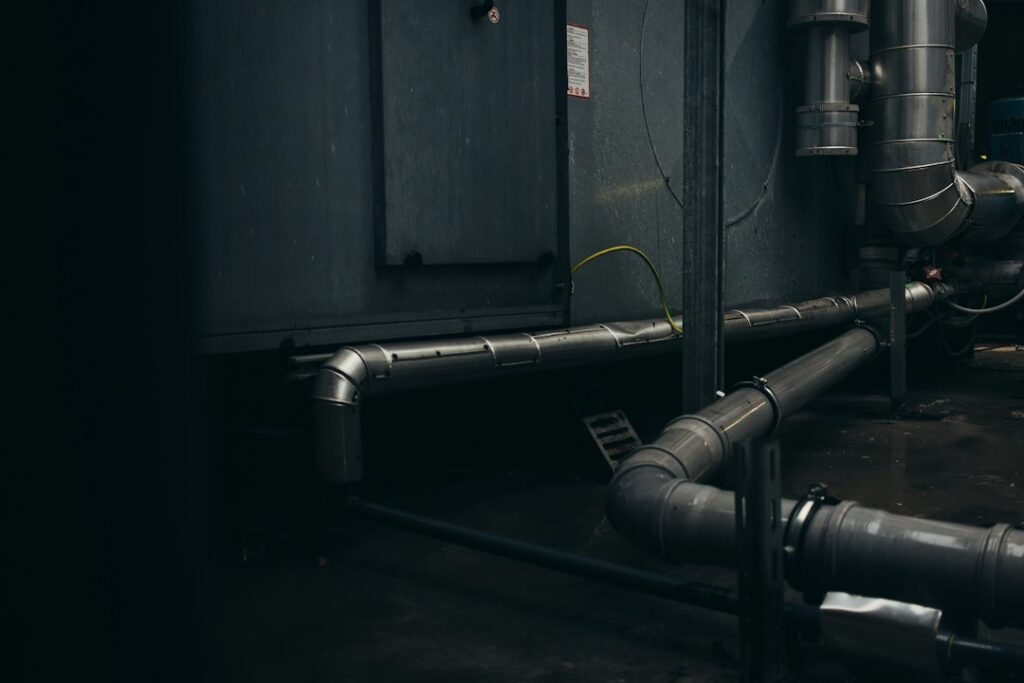
Exposed hot-water pipes can lose heat as water travels from the water heater to a faucet or shower. Insulating accessible runs helps keep more heat in the water, can reduce the wait for hot water, and may lower heat loss in basements, garages and crawlspaces. It is a practical maintenance project when the pipes are visible, sound and safely accessible.
This guide covers ordinary domestic hot-water supply pipes. It is not a guide to insulating gas lines, drainpipes, steam lines or a water heater itself. If a pipe is leaking, badly corroded, hidden in a wall, or close to a gas-appliance vent, stop and get qualified help before covering it.
Why insulate hot-water pipes?
- Reduce heat loss: insulation slows the transfer of heat from hot water to the surrounding space.
- Get hot water to fixtures sooner: insulated pipes can help water stay warmer while it travels through a long exposed run. They do not eliminate the normal wait for water already sitting in a pipe to clear.
- Protect exposed plumbing: insulation can add some protection to pipes in cooler spaces, although it does not make a pipe freeze-proof.
- Limit condensation on cold lines: insulating a cold-water pipe can help where humid air causes the outside of the pipe to sweat.
The U.S. Department of Energy’s Building America Solution Center recommends insulating accessible hot-water piping and notes that cold-water lines may also need insulation where condensation is a concern. Actual energy savings depend on pipe length, temperature, insulation and household use.
Which pipes should you insulate first?
Start with visible hot-water piping leaving the water heater, then work along accessible runs in an unfinished basement, garage, crawlspace or under a sink. Give priority to long sections that pass through unheated or cool areas. Do not remove finished walls just to reach hidden pipes for a small DIY project.
The DOE weatherization job aid uses insulation rated at least R-3 for at least the first six feet of both hot- and cold-water piping from a water heater. That is a useful reference, not a substitute for your local plumbing or energy code, the insulation label or the water-heater manufacturer’s instructions.

Safety checks before you begin
- Inspect the pipe and nearby fittings first. Do not cover active leaks, green or white corrosion, damaged joints or signs of water damage. See our guide to checking under sinks for early plumbing leaks if you need an inspection checklist.
- Do not obstruct the temperature-and-pressure relief valve or its discharge opening, and do not alter the discharge pipe. Keep shutoff handles, burner access, appliance controls, warning labels and electrical components visible and accessible.
- Keep insulation clear of the water-heater flue and other hot exhaust parts. PNNL guidance says to keep insulation at least six inches from a gas water-heater flue; where a pipe is within eight inches, it identifies fiberglass or mineral-wool wrap as the safer type. Follow the exact appliance manual and local code. If you cannot confirm the required clearance, leave that area alone and call a plumber.
- Do not use ordinary foam sleeves on steam or high-temperature heating lines. Those systems require insulation specifically rated for their operating temperature.
- If you find a gas smell, soot, a damaged vent or signs of combustion problems, leave the area and contact the gas utility or a qualified professional. Do not work around the appliance.
Tools and materials
For a straightforward exposed run, gather a tape measure, marker, sharp utility knife or scissors, correctly sized pipe-insulation sleeves, and the tape or fasteners recommended by the insulation manufacturer. Closed-cell foam sleeves are common for domestic water pipes. Check that the product is suitable for the pipe material, diameter and water temperature.
If using fiberglass or mineral-wool wrap, wear the protective equipment stated on its label, typically gloves, long sleeves, eye protection and a suitable dust mask. Keep the material dry and use a vapor barrier where the product instructions call for one.
How to insulate hot-water pipes step by step
1. Identify and inspect the pipe
Trace the accessible line from the water heater toward the fixtures. Hot-water supply pipes are often identifiable by their connection to the hot outlet, but do not rely on color alone. If you are unsure which line you are looking at, ask a plumber rather than insulating the wrong pipe. Make sure the pipe is dry and has no active leak.
2. Measure the outside diameter and length
Measure the pipe’s outside diameter, not just the nominal size printed on a fitting. Measure each straight section separately and note elbows, tees and valves. Pipe sleeves are sold in different inside diameters; a close fit helps avoid gaps and loose sections.
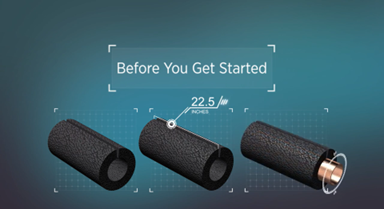
3. Choose insulation made for the application
Match the sleeve’s inside diameter to the pipe’s outside diameter. Check the product’s temperature rating and R-value, and use a thickness that meets applicable local requirements. For an ordinary domestic hot-water line, use a product specifically labelled for plumbing hot-water pipes. Do not substitute thin craft foam or general-purpose packing material.
4. Cut and fit the straight sections
Cut each sleeve to the measured length. Open the lengthwise slit and fit the sleeve around the pipe, keeping the seam positioned as the manufacturer directs. Bring adjoining pieces together without leaving open gaps. Do not stretch, crush or compress the insulation to force it onto an undersized pipe.
5. Fit elbows and joints carefully
At an elbow, cut the sleeve ends at an angle so the pieces meet neatly around the bend. Use compatible pre-formed fittings where available. Cover seams and joints with the acrylic or foil tape recommended by the insulation maker. PNNL’s guide describes securing sleeves with tape, wire, plastic ties or clamps at roughly one- to two-foot intervals; use the fastening method that suits the product and does not damage the pipe.
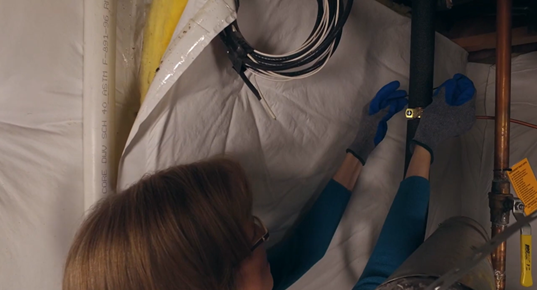
6. Keep valves and safety clearances accessible
Do not bury shutoff valves, unions or service points inside a permanent sleeve. Leave enough access to operate and inspect them. Around a gas water heater, keep all insulation outside the required flue clearance and away from the draft hood, vent connector and burner area. If the pipe route makes that impossible, stop and arrange a professional installation.
7. Check the finished run
Look along the entire insulated section. Confirm that seams are closed, joints meet, the sleeve has not slipped, and no valve or appliance component is hidden. Recheck the area after the next normal hot-water use for moisture or movement. If you discover a leak, remove only what is safe to remove and have the plumbing repaired before reinstalling insulation.
Can pipe insulation prevent frozen pipes?
It can slow heat loss, but insulation alone cannot guarantee that a pipe will not freeze during prolonged cold weather. Pipes in an unheated crawlspace, attic, garage or exterior wall may also need air sealing, improved space insulation or a properly selected heat-tracing system. Electrical heat tape must be listed for the pipe and location and installed according to its instructions and applicable electrical requirements. For more winter precautions, read our homeowner’s guide to preventing frozen pipes.
When to call a plumber
Get professional help if the pipe is leaking or badly corroded, runs close to a gas water-heater flue, is hidden behind finished surfaces, belongs to a recirculation or hydronic heating system, or requires moving pipework to fit insulation. A plumber can also check local code requirements and identify whether a cold or hot line is suitable for a DIY sleeve.
Frequently asked questions
Should I insulate cold-water pipes too?
Sometimes. Insulating a cold line can help prevent surface condensation in humid spaces. It can also add protection in cool areas, but it does not replace proper freeze protection.
Does pipe insulation make hot water arrive instantly?
No. It reduces heat loss from water in the pipe, but water already cooled in the line still has to move out before fresh hot water reaches the fixture.
Can I use foam insulation on every pipe near my water heater?
No. Check the pipe’s purpose, the insulation’s temperature rating and the appliance clearances. Keep insulation away from flues, vents, burner areas and safety devices. Use a professional if the layout is crowded or unclear.
Final takeaway
Insulating accessible hot-water pipes is a manageable home-maintenance task when the plumbing is in good condition and the work stays clear of appliance safety components. Measure carefully, choose a pipe-rated product, close every seam and leave valves and service areas accessible. When a pipe is damaged, hidden or close to a gas appliance vent, have a qualified plumber assess it first.
Image credits
- Featured image: Photo by Mykyta Martynenko on Unsplash.